From Band of Brothers to SAS Rogue Heroes: Inspired Kill Team Missions

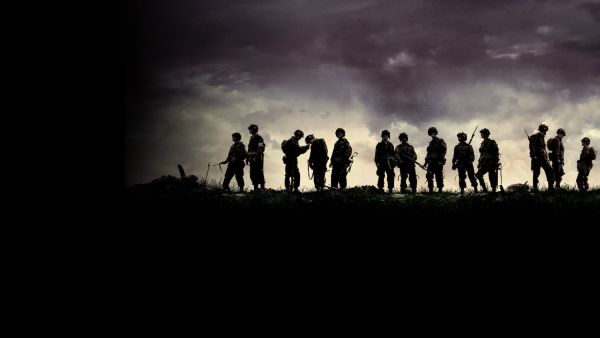
There’s something timeless about small squads of soldiers through a larger conflict — tense, personal, and filled with moments of heroism and chaos. That’s what makes shows like Band of Brothers and SAS: Rogue Heroes so compelling. These are exactly the kind of stories that Warhammer 40K: Kill Team excels at telling.

In Kill Team, every operative matters. You’re not moving faceless troops around a battlefield — you’re guiding a handful of specialists, each with their own role, personality, and fate. Which makes it the perfect sandbox to reimagine iconic World War II small unit missions with a sci-fi twist.

Let’s look at how you can take inspiration from Band of Brothers and SAS: Rogue Heroes and turn those classic moments of grit and brotherhood into thrilling tabletop missions.

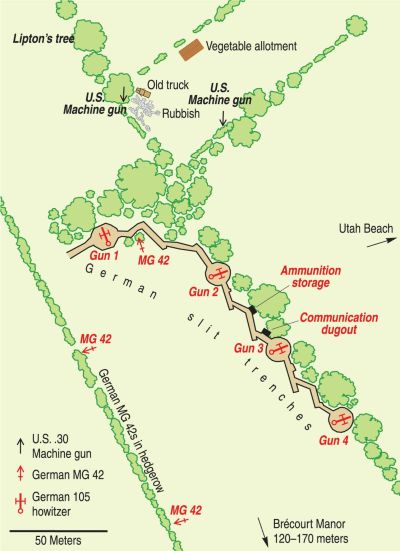
1. Brecourt Manor Assault (Band of Brothers)

Theme: Tactical problem-solving under fire.
The Scene: Easy Company (episode two) assaults a heavily fortified German artillery position, using initiative and teamwork to neutralize each gun in turn. In fact, this assault was so successful that they still teach it to officer candidates at West Point today.

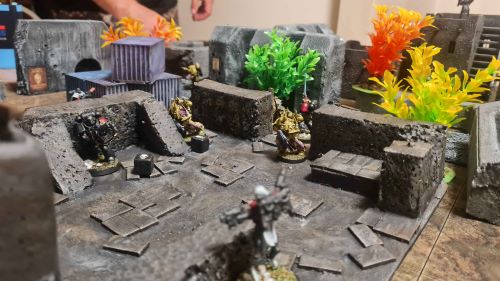
Kill Team Mission Hook: Your squad must disable a chain of heavy weapon emplacements. Each emplacement requires a different skill test or demolition action to destroy.

  • Objective: Destroy all three artillery emplacements before the end of the battle.
  • Faction Fit:
    • Attacker: Veteran Guardsmen, Intercessors, or Pathfinders.
    • Defender: Traitor Guard, Heretic Astartes, or Necrons.

It’s a mission that rewards smart use of cover, movement, and individual heroics — exactly what Kill Team is built for.

One thing I like about this mission is that you can set up the terrain to reflect the real engagement. Do away with the balanced terrain set ups suggested in the rulebook and give this a go. You don’t have to go with Normandy bocage either, why not set up your more grim dark terrain in a similar configuration.

If you’re worried about balance, why not play the game twice. Switching attacker defender roles each time will a fun experience.

Why not set up your battlefield to reflect the real engagement?

2. Desert Airfield Ambush (SAS: Rogue Heroes)

Theme: Guerilla warfare and improvisation.
The Scene: The SAS (episode 6) raids enemy airfields deep in the desert, using speed and shock tactics to devastating effect.

Kill Team Mission Hook:
One team is guarding a space port with specific objectives (spaceship, fuel depot, pilots building), while the other launches a hit-and-run ambush.

  • Objective: The defender must prevent the attacker from destroying 2/3 of the objectives.
  • Special Rules: Limited visibility due to sandstorm reducing ranged fire; fuel dump and spaceship can explode spectacularly.
  • Faction Fit:
    • Attacker: Ork Kommandos, Kroot Farstalkers, or Ratlings.
    • Defender: Astra Militarum, Adeptus Mechanicus, or Blooded.

This mission brings cinematic chaos to the tabletop — explosions, last stands, and desperate retreats.

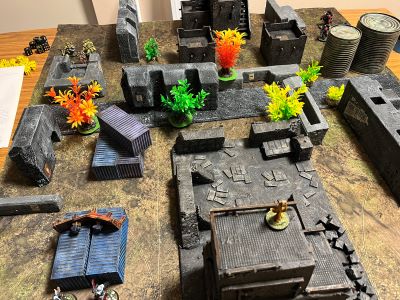
There is a great opportunity to make a themed desert table here. Build it out like an airfield/spaceport. If you have a spaceship model, why not place it front and center. Open spaces, palm trees, pilots mess hut, you get the picture.

This Bolt Action battlefield provides a good suggestion for the table layout. You can find more pics from the Warlord website.

3. Operation Market Garden (Band of Brothers)

Theme: Holding out against overwhelming odds.
The Scene: Allied paratroopers seize Eindhoven only to find themselves isolated and outnumbered as German counterattacks close in.

Kill Team Mission Hook:
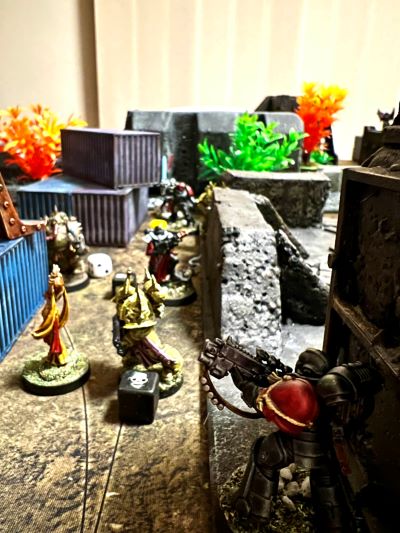
A beleaguered squad must hold a key structure (like a comms tower or reactor junction) until reinforcements arrive.

  • Objective: Survive for a set number of turns while preventing the enemy from capturing the objective.
  • Special Rules: The attacker’s numbers increase each round; the defender may receive one small reinforcement drop midway through.
  • Faction Fit:
    • Defender: Imperial Navy Breachers, Inquisition Agents, or Deathwatch marines.
    • Attacker: Chaos Legionaries, Ork Kommandos, or Fellgores.

This setup should create those tense, cinematic moments where every dice roll feels like life or death.

It could be played best as a joint ops mission, with two players fighting off waves of attackers. Why not create a densely packed board to replicate the close confines of the town. Narrow streets will create the need for desperate close combat actions, adding to the difficulty of completing the mission.

Bringing It All Together

By translating these real-world (albeit hollywoodised) operations into Kill Team missions, you blend the historical tension of WWII storytelling with the gothic sci-fi of the 41st millennium. You get all the things that make Band of Brothers and SAS: Rogue Heroes so gripping — camaraderie, courage, chaos — but with plasma rifles and occasional daemon incursions.

Basing your maps on these real engagements and creating asymmetric mission objectives will help add something different to your Kill Team games. So next game night, don’t just roll for missions — tell stories. Steal from history, tweak the details, and create moments that feel like they belong in both Normandy and Necromunda.

Kill Team Narrative Mission: Dinosaur Hunt Challenge

Kill Team is a fun, balanced skirmish game, with very thematic teams to choose from. Space Marines play like tough super soldiers and Orks are very anarchic. It also has a cooperative mode where players work together to beat NPOs (non player operatives) and achieve a shared objective. The range of available teams, 42 at the last count, and stats for various NPOs fills a very nice toolbox for the creation of narrative scenarios. This coupled with the fact that I’ve always wanted to play a big game hunt with dinosaurs since playing 40K as a kid has inspired me to build a kill team narrative mission. Of course there needs to be various twists and turns in there too. After all, no narrative mission is complete without secret objectives.

This mission is for six players plus a GM.

Mission Context

The Imperial Governor of Neblar Prime is celebrating his 150th birthday. Tradition dictates that he host a big game hunt as a core part of the festivities. Being useless with a gun, the Governor has engaged the famed Imperial hunter Thaddeus Ravenwick to bag a few dinosaurs for the feast. Of course, the hunters exploits will be televised across the planet so that all the citizens can share the excitement of this momentous occasion. It will be good for the morale of the workers.

However, the Governor should be more worried about the morale of the workers. Even now rebellion is fermenting, aided by a nefarious genestealer cult. The locals, who revere the dinosaurs are being stirred up and have been convinced that disrupting the hunt will spark an uprising that will overthrow their uncaring overlords once and for all!

The Imperial Hunter confronts the Young blood in thick jungles of Neblar Prime.

Factions and Objectives

This game is set for six players split into two factions, the imperial hunters and the zealous rebels/cult. A third faction, consisting of three dinosaurs will be run by the GM.

To win the imperials must kill more dinosaurs than the rebels can save. Five points each respectively. In addition each player will score three points for completing their secret objective.

Characters

Each player gets one character and one to two support operatives. I have listed them below including the equivalent Kill Team stats for each as well as their secret objective. All the Kill Team operative stats are free to download from the Warhammer website.

Team Imperial

Big Game Hunter:

  • The famous Thaddeus Ravenwick (Angels of Death Eliminator).
  • His trusty manservant Djeeves (Exaction Squad Vigilant).
  • Secret Objective: Keep your legend alive, kill at least two dinosaurs.

Long Suffering Security Detail:

  • Lt Salazza (Rogue Trader Void Master)
  • Shadowy guard (Rogue Trader Death Cult Assassin)
  • Secret Objective: Do your job, make sure Thaddeus is alive at the end of the scenario.

Imperial Scouts:

  • Lead scout Ragman (Space Marine Scout Sgt)
  • Scout (Space Marine Scout Hunter)
  • Secret Objective: Had a bar fight with the Rebel Gunna last night and need to finish what he started, make sure he is dead by the end of the scenario.

Rebels (Sneaky Genestealer Cult!)

The Boss:

  • Rebel Leader Vispoz (Wyrmblade Kelemorph)
  • Cult Brother (Brood Brother trooper)
  • Secret Objective: Make sure Thaddeus is dead by the end of the scenario and fuel the fire of the rebellion.

The Heavy

  • Gunna Bigarms (Brood Brother with grenade launcher)
  • Buddy (Brood Brother trooper)
  • Secret Objective: Had a bar fight with the Scout Ragman last night and need to finish what he started, make sure he is dead by the end of the scenario.

The Young Blood

  • Falco Soarer (Wyrmblade Primus)
  • Buddy (Brood Brother trooper)
  • Secret Objective: If The Boss doesn’t make it out alive you’ll get promoted. Make sure he doesn’t.

Kill Team Dinosaurs

The GM will control three mega fauna (dinosaurs) that the hunting party are stalking. These will be set up together in the designated area. Kill team stats as follows:

Grand Lizard (x1):

  • APL 3, Move 6″, Save 4+, Wounds 30
  • Melee Claws and Teeth Attack 6, 3+ 5/6 Relentless
  • Ignore piercing (tough hide), can attack twice per activation.

Sub Lizard (x2):

  • APL 2, Move 7″, Save 5+, Wounds 20
  • Melee Teeth Attack 4 3+ 4/5

The kill team dinosaurs operate in a simple way.

  • If they can see an operative – Charge and attack the closest.
  • If they cannot see an operative move in a random direction.
“I’m sure the lizard is around here somewhere”

Game Set Up

For this Kill Team narrative mission place thick jungle terrain across the board. Feel free to add ruined temples, abandoned hab blocks etc. Make the terrain denser than a normal Kill Team battle. A jungle stream with 2 bridges is also a fun addition. The dinosaurs start in a clearing to the right of the board. Make sure to have no firing lanes between the Imperial deployment and the dinosaur clearing.

Kill Team Narrative Mission map – play around with the set up to make something that looks thematic with limited firing lanes.

Terrain Rules

Some suggested rules for the terrain are:

  • Stream – minus 2″ to movement when crossing.
  • Jungle – blocks line of sight and gives light cover.
  • Ruins etc – heavy cover and blocks line of sight.

Playing The Mission

Players position themselves around the table in alternating order: Imperial-Rebel-Imperial-Rebel etc. Roll for initiative and play moves in the above order.

No tac ops, no crit ops. The sole mission is that described above.

Play lasts for 4 turns.

Final Thoughts

Although I’ve designed this narrative mission with Kill Team in mind this could very easily be ported to Space Weirdos or 5 Parsecs from Home. In fact I’m aiming to run this at the local club using Kill Team and Space Weirdos for the next Marty Con. I’ll write up a battle report when the dust has settled.

I’d love to hear if anyone uses this scenario. But if nothing else I hope I’ve shown that Kill Team can be used for some different narrative style missions. There is so much scope here. Lots of inspiration can be drawn from WW2 commando actions and I’m looking at how to create a 40Kified Battle of Termoli.

You can see more about the narrative Kill Team Campaign I ran here.

Saints Fate: A Three Player Skirmish Report

In last weeks post I described a recent three player skirmish scenario I designed. You can check out the details here. A couple of friends and I played it through one evening the other week to see how it actually worked. In short, it was amazing fun. But I’m always interested in what I can learn from the experience to take into future games.

The Scenario

A miraculous manifestation has occurred on the planet of Helios Magna. A Saint touched by the power of the God Emperor, has manifested among the ranks of the Adepta Sororitas, but her fate is uncertain. The Inquisition, ever wary of uncontrolled power, has dispatched a team of Lancet Hereticus Space Marines to capture her for interrogation. Meanwhile, a force of Chaos Plague Marines, the Ferrymen, seeks to claim the Saint for a dark ritual, hoping to summon a daemon of the Warp into realspace.

The Sisters of Battle, unaware of what forces are closing in, have fortified their shrine compound to protect the Saint. What follows is a brutal three-way battle where each faction must act quickly to achieve victory.

The protagonists included:

Order of the Veiled Light: crack team of battle sisters tasked with protecting the Saint at all costs. Comprised battle sister and flying assault troops. (Played by Marty)

Lancet Hereticus: Inquisition sponsored space marine fire team sent to capture the Saint to check for heresy and research. Comprised regular marines and a heavy weapons specialist. (Played by Sean)

Ferrymen: Small plague marine raider unit intent on capturing the Saint for the nefarious aims of the ruinous powers. Comprised plague marines and a mutated brother twisted by the rot of Nurgle. (Played by me)

The battlefield from the Battle Sisters side of the table.

How it Played Out

The aim of the three player skirmish scenario was to get the action happening quickly and make sure all three players were engaged throughout. All three factions entered the fray on turn one with frantic positioning as well as shots being exchanged. Initial casualties were quite light.

There was some difficult decision making for all players around how aggressively to go after the scenario objective vs protecting your team. Excitingly, all three factions had control of the Saint at one point in the game only to lose her to an opponent. This meant that the outcome of the game was always in question.

A cinematic brawl involving all three leaders culminated in the Ferryman captain sneaking the Saint away at the last minute to claim victory at the start of turn 6. A win for the nefarious forces of chaos!

Lancet Hereticus gunner observes the battlefield.

What Worked?

We used the One Page Rules skirmish ruleset: Grimdark Firefight, and it worked a treat. Fast, simple gameplay that had all three of us in the swing of things after the first move. With each player taking it in turns to activate a model this kept the game moving fast with no downtime for participants.

The victory conditions and time limit forced all three factions to engage with the objective pretty much immediately. It also kept each player battling on two fronts, no one was left out or ganged up on.

Finally, emergent play. All three players have some understanding of the 40K lore and got behind their faction and it’s aims. This definitely added to the immersion and I think colored some of the decision making as well. The cinematic three way duel by the captains at the end occurred completely emergently adding an awesome conclusion to the battle.

Mad scramble to secure the Saint in the alley next to the shrine compound. Marines, Plague Brothers and Battle Sisters all in attendance.

What Could Have Gone Better?

To be honest, not much. The battle flowed well and kept everyone engaged. The one thing I could have explained better at the start was the victory condition. There was a little confusion about how we achieved the win. We smoothed it out after turn 1, but clarity on this before we started would have helped.

Final Thoughts on Three Player Skirmish

All in all I succeeded in my goal of creating a fun, engaging, equal sided three-person skirmish scenario. The most important part was that we had fun playing. But I’ll be looking to see if I can come up with more three player scenarios in the future.

Of course, this battle now forms part of the Mordax Prime canon, my narrative setting for my 40K inspired gaming. With this victory for the ruinous powers, how will the Imperium authorities react? Will they mount a rescue mission? Or will the Saint become a tool of Chaos? We’ll find out in the next instalment…